The Right Teacher, The Right Time

I recently saw an inspirational type of social media post that stated that one of the greatest gifts we can give our children is the understanding that learning is a lifelong endeavour. A high school diploma or university degree should not signal the end of your learning journey. I whole-heartedly agree! I love learning new things! 

As much as I love learning, however, I have also discovered that for me there is a sweet spot where learning best occurs. The sweet spot happens when what I want to learn coincides with my ability to absorb the information, is crossed with my need to have or use the skill and is multiplied by the person or place I am learning from. 

I was reminded of this in a real “aha!” kind of way today. As an Apple tools aficionado, I feel relatively comfortable with Pages, Keynote and Numbers, even though we rarely use them in our district. I feel super comfortable with iMovie and Clips as I use them often. But Garageband has always eluded me. Terrified me, if I am being totally honest.

Not that I haven’t tried! I’ve watched tutorials, read the “Everyone Can Create” guides and I even attended a “way-over-my-head” lesson from one of the creators of Garageband when I was last at Apple Institute in 2019. I had pretty much figured that if I hadn’t learned from all of that I must be hopeless.

However, my word for this year is “challenge” and I decided that I should challenge myself to learn Garageband well enough to use it with students. So when the opportunity to learn from another Apple Distinguished Educator came up, I jumped at the chance, hoping I might learn something.

Luckily, today I hit my sweet spot for learning! I was well rested, not distracted, eager and determined to learn and I had the perfect teacher! She was calm but matter-of-fact and gave me just enough information that I felt successful but not so much that I felt overwhelmed. Kind of like Sheldon’s sweet spot on the couch. After the lesson, I felt curious and ready to try more on my own but also supported as she gave me her contact information and encouraged me to reach out if I needed more help.

BINGO….sweet spot! And another lightbulb moment for me as I made the quick connection to my students. Surely they all have, as you all must, their own “sweet spot” for learning. Maybe today is not the day that they’ll understand how to multiply fractions. Maybe it will be tomorrow, maybe next month or maybe with a different teacher. Or with different examples.

I guess my big point (in case you were wondering if there was one) is that learning is not a “one size fits all” endeavour. So neither should teaching be so. Now, don’t roll your eyes at me and be all “you’re just realizing this now?” I knew this before! But sometimes it takes an epiphany kind of moment to remind us about educational tenets that should be front and centre. Make sure that as a teacher you are also always a learner. I am certain that it makes you a better educator – I know it does for me! Now, hurry up Spring Break – I have a date with Garageband!

Book Creator As An E-Portfolio

About 5 years ago, our district used an e-portfolio tool that many of our elementary schools were really happy with. It was easy for teachers and students to use, allowed uploading of a wide variety of file types and the company was receptive to teacher feedback and concerns.

Sadly, the company was bought by another company, things changed and it was no longer the same digital tool. It no longer served the purpose we wanted it for.

So, for a year or two we kind of floated along. The secondary schools had a platform they used at varying levels, and that seemed to suit them. The elementary schools were left searching. 

Now we have a tool that, while not designed as an e-portfolio tool, can easily be used as one. BookCreator! By using the ability to create templates in Book Creator, along with a few little tricks, you can easily create an e-portfolio for any age, from Kindergarten to Grade 12 (and beyond, frankly!)

The Book Creator website has a few places you can look for ideas.

Student Portfolios – an explanation of portfolios and why you should use them, along with some examples and a portfolio template that you could use to get started

Examples Galore – there are loads of examples of all kinds of books here. Great spot for inspiration!

I would suggest you start by thinking about the following questions:

  • How do you want to use e-portfolios? (If you do not plan to have each student have their own portfolio then perhaps you are looking at more of a class newsletter type of publication, that you and the students build together)
  • What are the ages and capabilities of your students? (The younger they are, the more you might be inclined to create a fairly simple template that they all use. On the other hand, with more capable students you might want to give them carte blanche on design but specify what must be included on each page)
  • How much time and effort do you want to put into this? (This can be a slippery slope but luckily there is an easy way to push pages out to students so you do not need to copy something to each student one at a time!)
  • How “locked down” do you want to be? (If it is important that students include a picture of their growing plant in the upper left hand corner of page 12, then you need to lock down that picture space so that no one can move it. On the other hand, if they need to include a picture but you don’t care where it goes, just give them instructions and let them be the designers.)

Rather than writing out all the stages of creating a portfolio, I thought it would be cool to just create a video to show you!

Google Outliers

Today’s post is the final in a series of 4 posts, looking at a scope and sequence for teaching the use of Google’s Workspace for Education tools. Today we will look at what I call the “outliers”: Forms, Sheets and Jamboard. I call these the outliers: in other words, the tools that the fewest people seem to use with students (but that doesn’t mean they aren’t great tools).

Let’s start with Jamboard. Jamboard is Google’s digital whiteboard tool and it is pretty cool! I have written a post about its use here. Jamboard is certainly something that you could use with very young students and there are loads of examples online. The good news is that Jamboard is now an app for iPads, so it makes it even more intuitive to use with littles.

Jamboard has a pen function, a sticky note function, the ability to add images, shapes, text, drag things around and resize them. Students could use Jamboard for brainstorming, for collecting and arranging notes, for planning out a piece of writing. In addition, because of Google’s collaborative nature, students can work on Jamboard together. You can keep Jamboard files in their natural state or download them as jpeg or pdf files.

In terms of the Scope and Sequence, I would certainly use Jamboard with primary students, but I would set them up and have students use them. I would likely do the same with Grade 4. They are definitely old enough and capable enough to learn how to use Jamboard but there are loads of other tools they are learning at that age – don’t pile on too much at once.

By Grade 5 students should have been introduced to Jamboard, and should begin creating their own. The first Jam they create could be a brainstorm of things they like about school, or things they want their teacher to know about them! From there, the sky is the limit as to how you use Jamboard but it is an under-rated tool that more people should use.

Google Forms is another under-used Google tool. With primary students I would have them fill out a Google Form (possibly with parental help) but I wouldn’t yet have them create a Form, unless I did it with the class as a whole. The same would apply to Grade 4 and maybe even Grade 5.

Some time in late intermediate, I would introduce students to creating their own forms. Forms are great for making student questionnaires which in turn, are a great way to introduce students to data. As students gain experience Forms can be used for flow charts and even choose-your-own-adventure type activities.

I have written previously about Forms, here, here, here and here. Maybe something in these posts will resonate with you and give you an idea of a way you can use Forms with your students!

When you use Forms, the resulting data can be “automagically” collected in a Google Sheet, which is Google’s form of Excel or Numbers. Sheets can be used to collect data, manipulate it and even to create charts and graphs from the data. Again, before about Grade 5 or 6, I would use Sheets as a whole class activity. I have posts about Sheets here, and here.

The lowest level of using Sheets would be adding in data and then manipulating it by doing things like sorting it alphabetically or by size. The next level would be using the data in Sheets to create charts or graphs. Beyond that, students could learn to use the formula functions to do things like calculate taxes or extend patterns.

Docs, Slides and a Bonus!

This is the third in a series of posts examining the idea of a scope and sequence for using Google tools in a K-12 setting. Last week we looked at Drive and Classroom, this week we’ll look at Docs, Slides and Gmail.

The reality is that I could easily do an entire post on each one of these, but….let’s see if we can condense somewhat!

As a reminder, here is the scope and sequence. All three tools (Docs, Slides and Gmail) are introduced in Grade 4, although there is nothing wrong with introducing them sooner. The end goal is that by the time students leave elementary school (which they do at the end of Grade 7 where I teach) they are able to function completely independently.

Let’s start with Docs and Slides. Both of these tools are simple enough to start using and complex enough that there is plenty there to learn! By the way, for both Docs and Slides (and all of the other Google tools), there are plenty of online resources available.

Docs

Start:

Begin with just simple word processing. You would be amazed at how excited Grade 4 students can get when they learn they can choose different fonts and colours and sizes! Make sure they learn how to highlight, copy, cut and paste. Bold, italic, underline – let them play and then decide when you want them to use something functional (Arial, Black, 12 pt) and when they can have fun (Crafty Girls, Pink, 72 pt)! By the way, to add new fonts, click on the drop down menu beside the current font and choose “More Fonts” – I’ll let you decide whether or not this is something you want to share with them!

In terms of adding pictures, I would show them how to insert an image from their device and from the web.

Finally, make sure they know how to properly name a document and how to share it with others.

Solidify:

Of course, there are so many other things that can be done with Docs. Students should learn how to create bulleted lists, justify text, check version history, do a word count, add hyperlinks, emojis, charts and tables. They should know how to comment on a shared document, work on a shared doc and save their doc as a PDF.

Slides

Google Slides is so much more than just a presentation tool. It is much easier to move and resize images on Slides, as well as add colour and interest, so I often use Slides as a doc tool!

Start:

Start with making sure students can open a slide deck, add new slides to it and name it.

Then, move to text. How do you add text and how do you modify it? The cool thing with Slides is that you can easily move text around!

Next, look at backgrounds. The two easiest ways to add a background are to choose a “Theme” or select a Background. While backgrounds CAN be images, it might be best to start with colours and work your way up to images!

Make sure students know how to add images, resize them and delete them.

Finally, make sure they know how to move from “design” mode to “presentation” mode.

Solidify:

The main goal here is to learn how to use the “bells and whistles” like animation, adding video, copying, deleting and moving slides, arranging elements and modifying the “page” setup. Again, you can find resources here. One of the king things to work with students as they move into the solidify stage with Slides is how to make a good presentation.

The one google-y tool I would add to this section would be Read and Write for Google Chrome, as it works with both Docs and Slides and can be a real game changer for some students. If you are not familiar with Read and Write, here is a blog post.

Next week we’ll tackle Sheets, Forms and Jamboard!

Classroom and Drive – The Heart of Google ED!

This post is the third in a series of posts outlining what I believe to be a reasonable scope and sequence for Google (by this I mean Google Workspace for Education) use in a K to 12 setting. This post will focus on Google Drive and Google Classroom.

I consider these two apps to truly be the heart of Google’s Education Workspace. In my Scope and Sequence, I advise that you really introduce independent use of these in Grade 4, solidify that independence in Grade 5 and by Grade 6, students should be totally comfortable and proficient in using both Drive and Classroom.

Let’s start with Drive. You really want to teach your students to run their Google lives through Drive, as everything they need is there in that one spot. I tend to break Drive down into these 4 areas: The Sidebar, The Main Body, The Main Control and The Information.

For each of these areas, I’ll tell you what I teach students at the start and what I expect them to learn as they solidify their skills. After that it is just a matter of them using Drive enough that it becomes second nature to them.

SideBar

Start: 

  • How to use the New button to initiate a new item
  • Understand that they can open the Trash to look for things in it
  • Start learning how the Shared With Me section works
  • Understand naming conventions and how important it is to name files and folders correctly

Solidify:

  • Understand why you should Start a new Doc, Slide, etc INSIDE the folder that will eventually house it
  • Understand that Trash empties every 30 days and after that, you cannot retrieve whatever you threw out
  • Learn how to search in Shared With Me
  • Know how to use the Recent button to find work

Main Section

Start:

  • Know how to create and name folders (bonus fun – can you make them different colours)
  • Know how to drag folders, docs, slides around

Solidify:

  • Understand the tools that show up when you right click on a folder (and how to use them) NOTE: This set of skills takes time to develop!
  • Learn how to share work with other people NOTE: This also takes time and you can expect students to make mistakes so give them opportunities to practice this!

Main Control

Start: 

  • Learn how to do a basic search
  • Learn how to use the Google “waffle” to access all of the “apps” like Jamboard, Slides, etc
  • Learn how to recognize the difference between being logged into the school Google Drive and a personal Google Drive NOTE: Many students (even as young as Grade 4) have their own personal Google account. It is important to teach students how they can toggle back and forth between their Google accounts. This is accomplished in different ways, depending on the device and browser they are using. 

Solidify:

  • Learn how to do a more advanced search, using parameters such as name, who owns it and what app created it

Information

Start:

  • Learn how to toggle back and forth between a list view and an item view – decide which one fits you better as a learner

Solidify:

  • Learn how to use the little i in a circle to see your Drive history

Beyond all of this, it is important for students to know how to log in to Google Chrome with their school account, so that they can use Read & Write for Google Chrome.

In terms of Google Classroom, I advise that you use it often and in a variety of ways, so that your students get very familiar with it.

Start:

  • Have the first few assignments that you collect be worth nothing – they should just be practice assignments. For some students, the whole “Submit” process is a little intimidating at first
  • If you have allowed students to post and comment on the stream, give them one day to be a little silly about it. Then remind them that everything they post has their name attached to it and you can see if people are being inappropriate. After that, posts and comments should all be appropriate and about school.
  • Make sure they know how to see where their upcoming assignments are listed

Solidify:

  • Show students how they can leave Private Comments for you 
  • Show them how they can email you and other students directly through Classroom.
  • Make sure they have a strong grasp on the whole “submit” process, along with “unsubmit” and when and why they might want to use that
  • Show them where the Classroom file is located on their Google Drive 

Next week we’ll look at the main Google apps!                                                                         

Google With Littles

Last week I published a scope and sequence for Google use in my district. In an effort to be clearer, that table referred to what age I would begin having students use those tools for creation, not consumption. What do I mean by that? Well, I certainly wouldn’t spend the time and energy to teach Grade 2s to build their own forms (creation) but I might send a form home for them to complete with their parents (consumption). So, with that understanding in mind, let’s move forward and talk about the littles – those students in Kindie to Grade 3.

In our district, K to 3 students do not bring devices to school with them. Nor do they generally have access to laptops at school. They do have access to iPads, which in my mind is ideal. Tech use at this age should be all about play, exploration and creation and iPads are wonderful tools to use to support those goals. Having said that, all of our K to 3 students do have Google accounts and K to 3 teachers certainly have access to all of the Google Workspace for Education tools. In the scope and sequence, you will see that for K to 3 I have noted three Google tools that I think should be part of the K to 3 environment. They are Classroom, Docs and Jamboard. Why these three? So glad you asked! Let’s dive in….

Classroom’s main function is as a learning management/organization tool for teachers and students to share. Assignments and information goes out from the teachers and assignments and information comes back from students.

In Primary, Classroom can be used as a communication tool very easily. Parents can be given their child’s username and password so that they can log on to Classroom. From there, the teacher can use this as a way to send out information to families. Need to remind parents about your weekly library visit? Pop it into the Stream on Classroom. Wait…..I can already hear the protests…..Yes, I agree that having students write “Library” in their planners is a great way to help them build executive functioning and independence, and yes, many parents won’t look on Classroom and yes, that’s what weekly newsletter are for. My responses? Not all students are capable of writing in planners, parents will look on Classroom if you train them to do so (and even then, some won’t – they are no different than kids!) and by all means, continue your weekly newsletter and just pop a copy in Classroom as “Material”. By the end of the year, there will be a whole year’s worth of collected newsletters you (and families) can look back on.

Of course, this kind of communication is just the beginning for Classroom. If you are about to do a unit on the seasons, ask the question “What is your favourite season and why?” on Google Classroom Stream and allow students to respond back (with parental help). Not only will you preload some thinking about seasons but you will also involve families and maybe even prompt some good home discussions. 

As students get a little older, you can start assigning basic doc tasks to them (with a little scaffolding and explanations for parents!) A great starting task might be having students practice typing their first name over and over on a doc – finding the letters and learning how to make a capital are great skills! Send out a template like this one (feel free to make your own copy of this and use it). Assign it to students using the Create Assignment button in Classwork. Make sure parents know they need to type the name the first time and then after that they can lend support as needed. 

As you students get more confident (and older), you can make the assignments more complex. The good news is that you are building keyboarding skills as well as a general familiarity with Google Classroom that will serve those students well in Grade 4!

The other Google tool that I would start introducing at this age is Jamboard, simply because it is so easy to use. Jamboard is Google’s version of an interactive whiteboard. It’s fairly basic, which is what makes it appealing to use with littles and there is an iPad app for it so you could even introduce it at school and then have kids practice at home. Here is a basic intro video for Jamboard and here is a template with a few Jamboard ideas you could share with students. When you assign these on Google Classroom, you generally want to make a copy for each student, so they all get a chance to play with the jams. Once they get confident playing with the jams you have created you could always give them a chance to make their own! It is a great tool for brainstorming!

A person could make an argument for introducing primary students to Slides and maybe even Forms and you certainly could. However, it is not likely that they would be individually creating Slides or Forms, so I have left them off of the list. Next week, we’ll take a look at introducing Drive and Classroom to early intermediate students.

Google Scope and Sequence

When I was a new mom I was very careful to buy toys and books that were for the right recommended age for my children. I dutifully bought Duplo before Lego, assuming the experts were right about choking hazards and hand dexterity. Of course, there are always outliers – 2 year olds who can build Lego spaceships and 12 year olds who still put little plastics toys up their nostrils BUT for me, as a first time parent, the guidelines made me feel confident that I was doing the right thing.

As teachers, we use guidelines like the curriculum to help us decide what to teach when. We have curricular guidelines for pretty much every subject taught in BC classrooms. With regards to technology in the classroom, we have the ADST curriculum, which most teachers have at least a general knowledge of and we have the Digital Literacy Framework, which most teachers are unaware of. It’s not the easiest document to slog through and it’s a lot more suggestive than prescriptive.

All of this got me to thinking about the main technology we use here in our district – Google Workspace for Education. We don’t have any real sort of guidelines, a scope and sequence if you will, for Google. Our students don’t generally get immersed into the Google environment until 4th grade but from there, we have no logical path for teachers and students to follow. Should students learn to use Forms in Grade 4 or wait until Grade 9? What about Docs? Or Jamboard?

So, here, for those that would like it, is a fairly general “West Vancouver” scope and sequence for all things Google Workspace for Education. It’s based on my years of working with Google and kids. If it helps you and your students, great! If you feel the need to modify it to suit your class and circumstances – totally fine!

To clarify:

Primary – I expect that in primary teachers are mostly using Google with the aid of parents. Classroom might be mostly used as a communication tool and Drive and Jamboard could be used with students with a fair amount of scaffolding.

Introduce – slowly introduce the skills required, using scaffolding and real-world tasks

Solidify – continue to teach/learn the skills needed, give lots of practice, celebrate student “experts”

Use – at this point, the tool is one that teachers should be able to expect students to use in a proficient manner

So, do you find this Scope and Sequence aligns fairly well with what you already do? Are there areas of Workspace that you haven’t really used? Over the next few weeks I plan to dive into this topic more deeply and hopefully give you and your students some tips and tricks and ideas for how to use this guide to help you!

End of Semester Google Grab Bag

Here in my district, our high schools are just getting ready to switch from one half-year semester to the other. For almost half of our K to 12 system, it’s almost like it’s the end of one school year and beginning of another….all squished into a three day space!

So, in case you are one of those schools, I thought I would throw out a few little reminders. Housekeeping type stuff!

The end of a year/semester is a great time to do a quick tidy up. Why not start with your Google Drive? Once you have dealt with marks and assessment, get rid of all the stuff that has been shared with you, like assignments, that you no longer need. On the other hand, be conscious of files/sites you used and found helpful. Keep these neatly filed away in appropriately labeled folders on your drive. Remember that anything you put in the Google “trash bin” stays there for a month so if you accidentally throw out something you need, there is time to retrieve it!

As far as Google Classroom goes, there are several things you should do. Start by archiving the classes you just taught. They are still there and available to access if you need them – they’re just not front and centre! If you are going to be teaching a second semester of, say, English 9, you can make a copy of that class.

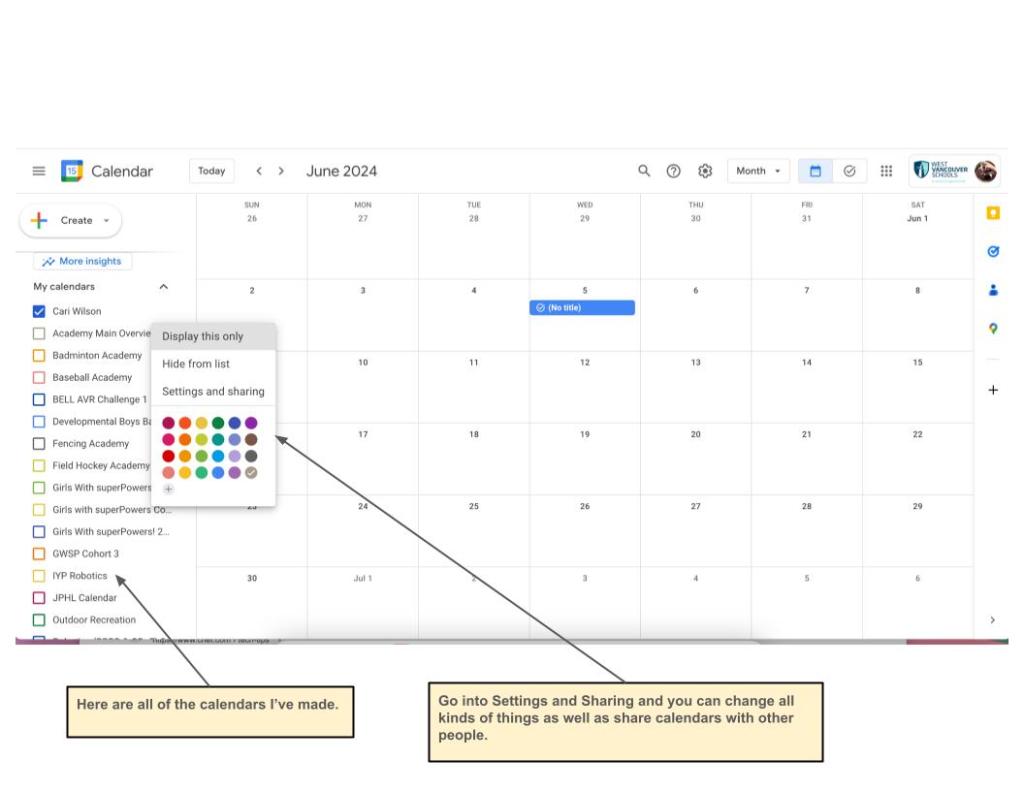
To archive or copy a classroom, just click the little timbits (or snowman) to the right of the class name and you will see the options pop up.

Archived classrooms can be accessed via the left hand sidebar. 

When you copy a classroom, you get to keep most of the important bits and the rest is jettisoned! Here is a screenshot showing what is kept and what is not. It’s nice that most of the work that went into creating that classroom can be re-used!

Hey, while I have your attention, here are a few quick Google tips!

Check Your Search

When you are doing a Google search and wondering about the safety or history of a website, click the little timbits/snowman directly to the right of the name of the site and it will give you some information about who owns the site, etc.

Quick QR Codes in Chrome (say that ten times fast!)

Did you know that you can generate a QR code directly from your Chrome browser? Let’s say you find a great research site for a topic your class is currently studying and you want to pop it into a class newsletter!

Start by looking to the far right of your omnibox (where the address of the site is). Look for the “share-ow” [share arrow – it looks like an arrow coming out of a box]. Here is what it looks like on Apple devices:

Click on the share-ow and you will get a variety of choices, one of which is “Create QR Code”. If you choose this one, it will create a QR code with the cute Google dino in the middle. You can screenshot this or download it and use it to direct people to the site you want them to see!

BTW, the QR code above is for the Otter Critter Cam at Monterey Bay Aquarium…mic drop!

Monkeys, Shakespeare and AI

The “Infinite Monkey Theorem” is a pop culture idea that posits that a monkey (given a typewriter and an infinite amount of time) could eventually write all the known words and maybe even put them together and replicate famous literary works, like Shakespeare. Now, we all know monkeys do not have infinite lives and are probably not that interested in typewriters (or Shakespeare!), BUT….a fairly simple computer could be programmed to generate random “strings” of varying sizes and, given enough time it could generate all known words (as well as many nonsense words, of course)!

Why is this important? Well, if you take the above computer and throw in a helping of artificial intelligence, the words being generated are no longer random. And if this sounds like far-fetched science fiction, it’s not. It’s here right now, with the potential to change education and other fields in ways we probably don’t even understand yet!

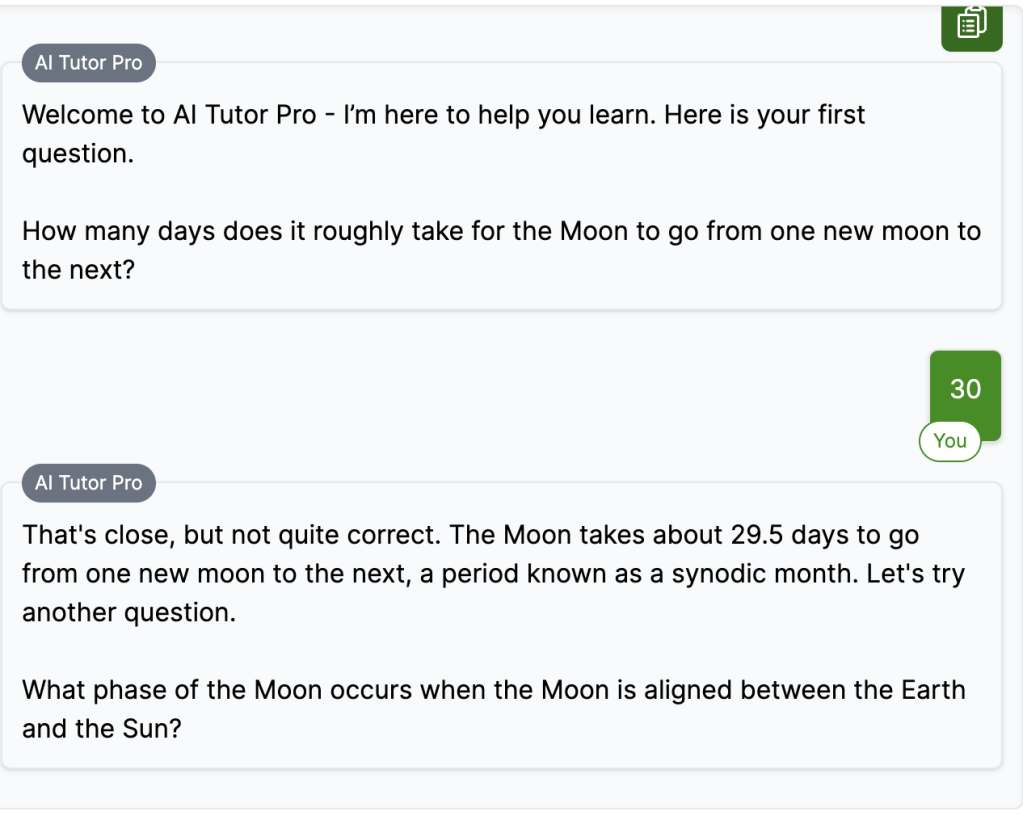
One of the “first out of the gates” here is ChatGPT, an AI bot that uses large language models to learn from massive text and data sets and then be able to use what it has “learned” to answer questions and produce written work like poems and essays. ChatGPT launched in late 2022 and it has quickly become the “talk of the town.” People were curious and wanted to test it out. Prominent ed-tech blogger Eric Curts used it to write this post and West Vancouver Schools’ Superintendent used it to help him write this post. Now, both Eric and Chris are quick to point out that they used AI and it’s not something they plan to use regularly. However, it is worth taking a look at how this technology could impact education!

Critics say that the AI can produce incorrect information as well as writing that does not make sense, but it doesn’t take much imagination to see how this could potentially be used like a “ghost writer”. A student could task the AI with writing a 1000 word essay comparing Napoleon to Hitler, go walk the dog and come home to a finished assignment! I would be willing to bet that some students have already done this!

Hmmm….I can already hear (and sympathise with) the questions and concerns! Why bother teaching essay writing? How will I know if the student actually wrote this? Is this cheating or a smart use of technology? Does everyone have access?

I would argue that the same thing happens every time education is faced with new technology – the sky is falling! Well, the advent of audible books and read-out-loud technology did not signal the end of us teaching students to read. What that technology did do was make reading and books more accessible for people who struggled. My husband has dyslexia. Before he got an Audible account he might read only one or two books a year and even that was a chore. Now he plugs in on his morning dog walks and happily listens to many interesting non-fiction books every year. 

I don’t think this new AI technology will cause us to stop teaching students how to write. What it may do is challenge us to decide what parts of writing and communication we want to focus our efforts on. We will be challenged to find ways to use this technology to benefit students and continue to evolve the concept of education.

We want to teach our students to be problem solvers and critical thinkers and communicators and collaborators. We want them to create a better future. This is not going to change. But the tools that we collectively have access to will continue to change and we need to be ready to engage with them. I am certainly curious to see how this one plays out!

Happy Holidays!

Well, here we are. It’s almost the end of another calendar year, although not the end of another school year. There are 9 days left until the darkest day of the year, and then it starts to get lighter again. It’s a good time to be introspective and look back at the year and yet a good time to be excited and look forward. Whatever you do, forwards, backwards or upside down, make sure you take some time out to look after yourself and do things that bring you joy!

By the way, the snowman gif was made by Ellie, one of the students in my Digital Art class. It’s one of the many activities available for you to use with your students in this year’s The 12 Days of Techie Christmas! See you in 2023.