Coding and Computational Thinking Have Not Disappeared!

Remember a number of years ago when the government realized that computational thinking and basic coding were future-ready skills, and they poured a bunch of money into coding in education? Yep, me, too! It was an exciting time! Lots of great grass-roots organizations like Hackergal and Kids Code Jeunesse got funding to help them grow and many teachers here in BC got some basic training. Fun times!

Since then, teachers have been busy staying on top of all sorts of events, not the least of which is a global pandemic. Many people in education have been in survival mode for most of this year, so it’s understandable that “coding” might not be top of the list for teacher concerns! 

However, the reality is that many/most (depends on who you talk to) future jobs will be code-related or code-adjacent, meaning that a basic understanding of computational thinking and coding will be vital to those jobs. And sure, we could wait until students are in those jobs to teach them the coding skills they need but at its base, coding is a language with syntax, structure and idiosyncrasies. And as educators, we know that children absorb languages more quickly than adults, so why not teach the “language of coding” while they’re young?

Getty Images/iStockphoto

The good news for those of us that don’t eat, sleep and breathe this stuff is that once a year, every year, coding and computational thinking are celebrated throughout the world during Computer Science Week (also known by some as Hour of Code Week). This week it occurs from December 7th to the 13th. The rest of this blog, then, is a guide to opportunities for you and your students to spend a bit of time exploring coding!

Hour of Code

Hour of Code is both a website and a movement. Either way, the purpose is to introduce K to 12 students and teachers to coding. The site is filled with hour long coding puzzles and activities that you and your students can do. The site also has links to Code.org, where you can find free online courses for students to take, as well as all the materials that you, as a teacher, would need to have to teach your students the courses (even if you have no coding experience!)

Every year, Hadi Partovi and his team at Hour of Code outdo themselves thinking of ways to get students interested in coding. Once year, the Anna and Elsa “Frozen” game was a big hit, another year it was the Star Wars game. This year there is a true plethora of activities, from basic puzzles for non-readers to Java and Python tutorials for keeners. Talk about meeting every learner where they are!

Scratch and Tynker

Maybe you’re planning on doing Coding Quest this year with your students (more info coming in an email later this week) and you want to get them up and running on Scratch or Tynker? Great idea!

For Scratch, the kids can create without having an account by just going to Scratch and then clicking Create. However, it would be better for them to have an account so they can save their work. To do this, you need to apply for a teacher account (it usually takes a few days, so do this well ahead of time) and then follow the Best Practices advice here. If you and your kids are new to Scratch, have them work on the Tutorials. If they are familiar with Scratch, have them try making some of the basic games mentioned in this blog post.

For Tynker, follow the Best Practices guidelines here, for setting up your class account. Then have you students do the activities in Programming 100. Then they can try building the same basic games as in Scratch. The coding concepts are the same, the language is a bit different. And the cool thing with Tynker is that if you have any advanced kids who know Java or Python, they can work in that language!

More Blog Connections

I have blogged about coding many times, as follows:

Unplugged Activities

If you and your students don’t have access to devices, or you’d rather kick it old school, there are loads of great “unplugged” activities you can do that will support computational thinking! Here is a “cheat sheet” with some great ideas, sorted by grade!

Homegrown Activities

One of our West Vancouver parents, Tomoko, is the CEO of a coding education company and she has kindly given us access to 4 lesson plans that we can use, for students from Grade 4 to 12, as follows:

  1. Intro to VR coding – What is a 3D coordinate system? (Grade 4 to 7)
  2. Intro to VR Animation – Moving an object in three dimensional space (Grade 6 to 8)
  3. Interactive 3D animation – How to use user interaction as a trigger for 3D animation? (Grade 7-10)
  4. Tell your story in VR – What is the effective way to use 3D animation to convey a message? How can I design and use my own 3D model in VR? (Grade 9-12)

To access these activities, click here. You will find set-up instructions on the second page of each lesson plan. It takes about 15 minutes to complete.

Apple Coding!

Apple has a number of great activities set up for CS week. You can download A Quick Start to Code to see some fun and basic activities that use Apple’s Swift Playgrounds (free and TOTALLY addictive, speaking from experience) a coding platform available on iPads and Mac devices. 

In addition, Apple has two awesome webinars running on CS week. The first webinar runs on Wednesday, December 9th from 4 to 5 pm PST and it’s called “Swift Playgrounds, A Quick Start to Code”. The other one runs on Saturday, December 12th from 9 to 10:30 PST. It’s called “Coding From the Heart” and it’s all about ideating and designing apps to help the world – no code needed! Bonus…I am one of the Apple Distinguished Educators conducting this particular webinar! Click here to register for either of these….they’re free!

So, whether you want to go unplugged or try something totally new, I am encouraging you (begging, pleading, imploring, asking, cajoling, etc) to engage in a class activity during the week of December 7 th to 12th. Help your students be future-ready!

Three Little Things (That Are Cool)!

You know that feeling you get when someone shows you some little tech trick you never knew of and you are like…”Wow! That’s so cool!” And then you go home and show everyone you know and they think you are really smart? Yeah, well hopefully you will have that feeling after reading today’s blog!

Images in Google Forms

Google Forms is one of Google’s underutilized tools. And yet, it can be used in so many ways! Want to give a quick quiz? Use Forms. Poll your students? Forms! Let everyone in the class give their opinion? Forms, again! Give a survey, get kids to apply for class jobs, track home reading progress…forms! You get the idea, right?

Due to what Forms does, people think of it as mostly a text based tool. However, you can add images to forms! This can be used in many ways. Here’a video that goes over the different ways of adding an image to forms.

In a quiz, having an image can make the question clearer. In this example, I used an image of the salmon life cycle with each stage numbered. I then used the “Multiple Choice Grid” question type for the question.

The other great thing about adding an image is that students who can’t read or are struggling readers can still respond, as in this example using images of ice cream flavours.

Since forms can easily be added to Google Classroom, even our littlest learners can be given a form if you are using pictures to help them understand!

Video in Google Forms

The picture thing is pretty cool, right? Well, you can also add Youtube videos to Google Forms. The video is not embedded in the question, like the images were. Rather, you put the video first and then the questions/comments afterwards.

You could use this as a provocation – show a video and then use the “paragraph” answer type for students to write in what they think about the video, or what they wonder. This is a great way to do things if you and your students are isolated or even hybrid! You could also show a video and use the paragraph answer for a prediction – what do they think will happen next? Or you could simply look for an opinion, as in this “pet a whale” example! 

Bonus Tip of the Day – Interactive Checklists!

I’m not sure about you but I LOVE ticking things off on a to-do list. It makes me feel productive! For students, checklists can be really helpful for keeping track of homework, tracking steps in a long project or in a Math problem or even counting down the days until a happy event!

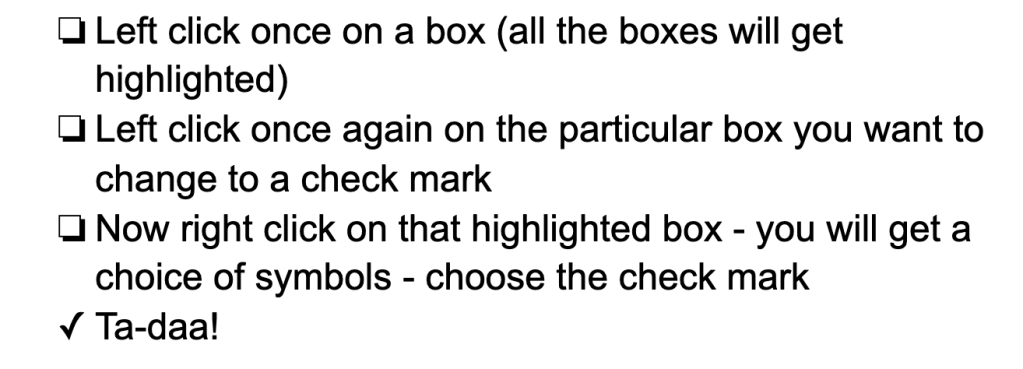
Both Google Docs and Slides have the ability to put created a bulleted list with checkboxes as the bullets. I often use these in typed out instructions I give kids for projects. Here’s a quick video on how you do it:

And for those of us who like written directions, here it is:

Okay, so it’s not as exciting as the news about the potential new Covid vaccines, but you’ve gotta admit, cool little tricks like these impress people!

Next week….how to get ready for Computer Science/Hour of Code week!

Super-duper Screencastify!

Back in the spring, I wrote a blog post entitled “One Thing We Should Keep”. At that time I wrote that I felt one of the things we should keep from our initial lockdown experience, was the practice of recording parts of our lessons or creating video tutorials that students could watch repeatedly. 

I still think this is a great practice. It doesn’t seem that Covid is going away anytime soon and in our district we’re even starting to think that maybe some secondary courses will continue to have hybrid structures once the virus is vanquished. So the idea of screen capturing our teaching has longer validity than just in pandemic times.

So….what tool should we use? If you’re using a Macbook, a simple Command, Shift, 5 is enough to record what’s happening on your screen. Pretty simple. Then there are apps like Camtasia and Final Cut – expensive, professional quality results, to be sure! But the learning curve is steep and, as I noted, the apps are expensive. So, where is the middle ground? In our district, we’ve settled on Screencastify, for a number of reasons. 

First, it integrates seamlessly with Google, which is important for us from an ease of use standpoint. Videos save automagically to your Google Drive (into a folder called Screencastify), they’re simple to add to Google Classroom and you can even embed them on Google Slides! 

Second, Screencastify is easy and quick to learn to use. Teachers are busy – they need tools that work well and don’t take a long time to master. 

Third, the cost is perfect…free! Well, I guess technically it’s “freemium”. The free version allows you to do almost everything but your recordings cannot be any longer than 5 minutes. While that might seem like a problem, the attention span of an average student isn’t likely much longer than that these days! And if you really need to make a longer video, you just make multiple short ones! The paid version of Screencastify allows you to record for an unlimited time. 

Screencastify is a Google Add-on, which you can install by going here. Screencastify has some great resources on their website. There is a beginner’s guide here. At this point, Screencastify has three functions: Record, Edit and Submit. In our district we can use Record and Edit.

NOTE: The Beginner’s Guide says that with the free version of Screencastify you can only get a trial of the EDIT function. This has now been changed and the EDIT function is free for videos up to 5 minutes long.

Here’s a link to an ebook called 50 Ways to Use Screencastify in the Classroom. Screencastify runs frequent webinars, which you can access here and you can even earn digital badges by taking short how-to courses, located here.

So, this is all well and good, but you want to actually see how to use it, right? Here goes:

See what I mean? Easy to use! You’ll get the hang of it quite quickly. Think of the things you can quickly and easily do with this tool:

  • Create a tutorial showing students how to use a new digital tool
  • Create a tutorial showing parents how to access digital tools at home (great for ELL parents who can follow the video without having to know all of the language)
  • Create a quick video for a TTOC, explaining how to do a particular task with the students

I bet you can think of loads of other, even better ways to use this tool! Enjoy!

Gretzky, The Junior Player and What I Learned

You’ve been warned: This week’s blog is about education and life, but not about technology. Just sayin’.

You know how you’re just going along in life, minding your own business, thinking about what to eat for dinner and then WHAM!, two seemingly random occurrences happen and your brain puts them together and a spark goes off and you think…aha!! It happens to me on a regular basis and it happened last week. Like this:

I was driving to work and talk radio had this segment about Wayne Gretzky and Joey Moss, who recently passed away. For those who don’t know, Joey Moss met Gretzky back in the 80s. Gretzky was taken with Joey’s love of hockey and he convinced then General Manager, Glen Sather, to hire Joey to work in the locker room. 

Joey quickly became a fixture with the Oilers; popular with players, staff and fans alike. Joey had Downs Syndrome.

Later that same day an article showed up in my Facebook feed. You might have seen it, too. It was about a young hockey player that the Arizona Coyotes had originally drafted and then renounced over the details of a story about him bullying a fellow student in high school.The player was also subsequently dropped by his university hockey team. The young man he bullied has developmental disabilities.

Wham. Two young men with disabilities. Two hockey players. Two totally different outcomes.

The main reason I bring this up is that, as educators, we are all going to teach students who are differently abled, for one reason or another. It wasn’t that long ago that many of these kids were kept out of the regular classroom and often out of general society, too. 

Thank goodness we now know better. Yes, these kids can sometimes be hard to have in the classroom. They take extra work, extra meetings and extra resources. There are IEPs to fill out and EAs to fill in. And no matter how hard you try, you will have days (often many of them) where you will wonder if you are teaching these kids anything.

Well, guess what? What you teach them is minor in comparison to what they teach you and the rest of the people around them. These kids teach us to live for the moment, to appreciate life. They teach us that we’re all different and that it’s okay to be who we are. They teach us to laugh and cry and celebrate every little step forward. They have to work harder than everyone else. It’s harder to learn, it’s harder to make friends, it’s harder to do just about everything. And yet they persevere. And their example helps us stand a little straighter, work a little harder and be a little kinder. 

When I think of the special kids I’ve taught over the years, I remember their smiles and I remember the lessons they’ve taught me. I remember how they taught their classmates to be more accepting and more kind. Of Joey Moss, Gretzky said, “He made our lives better. It wasn’t just us making his life better.” I couldn’t agree more.

What about the bullying hockey player? Where does he come into the equation? He’s the reminder we need to keep focusing on kindness, acceptance and tolerance in our classrooms and in our lives.

Thanks for indulging me. Back to ed tech next week!